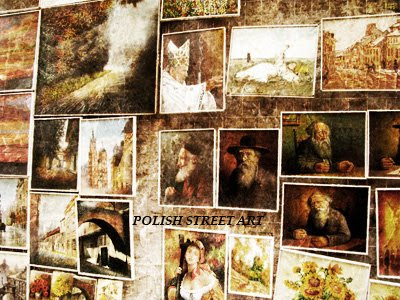
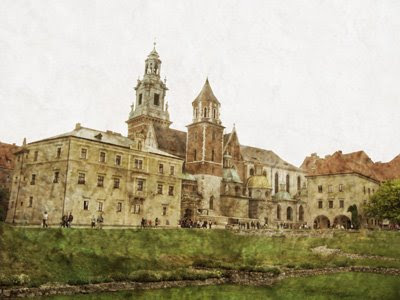
I did some photo texturing of my own for the RSVP postcards and our postcard guestbook and today I am going to show you how to add "textures" to photos using a photo editing software that works with layers, like Photoshop. A free trial of Photoshop can be downloaded here. I imagine you can do the same thing with the free editing program, Gimp.
Before you can do this, you need some textures. My flickr album of textures, can be found here. Please help yourself! Many of these textures are from Europe, but some of them are from the parking garage where I used to live in Utah. I guarantee that you can find at least 10 just in your house. Just walk around wherever you are and collect closeup shots of different textures like I have over the past few months.
*Please click to enlarge all "Photoshop demonstration" photos in order to better read the text on the screen shot.*
I looked through my folder and chose this texture:
And this photo of Krakow:
Step 1:
Open up both photos in Photoshop.
Step 2: Make sure that the "Move" tool is selected (the red arrow is pointing to it). Click on the texture photo, hold down your mouse, and drag the texture photo on top of the photo you want to texturize (in this case, my photo of Krakow). Let go of your mouse, and look in the bottom right corner of your screen. You should now see two different "layers", one that says Background, and one that says Layer 1. Make sure Layer 1 is selected and click and drag on your photo to center Layer 1 on top of the Background layer.
Step 3:
With Layer 1 selected, look in the bottom right hand corner again and click on the blue arrow to access the pop-up box (the red arrow is pointing to this box). These options are "blending modes" and will allow you to create the textured effect.
Step 4:
I chose "Overlay" which is my favorite option, and look what happened to my photo!
Step 5:
I would like the colors to be a little less vibrant, so with the Background layer selected (the bottom arrow is pointing to it), I went to Image-->Adjustment-->Color Balance from the menu options at the top of the screen. The box that the upper red arrow is pointing to should appear. Dragging the sliders around will affect the color of the photo.
Step 6:
"Antiqued" photos usually also have a de-saturated appearance, so I went to Image-->Adjustments-->Hue/Saturation and dragged the sliders around to affect the vibrance of the image.
This is what I have so far.
Step 7:
The texture is a little heavy, so I selected Layer 1, and clicked on the arrow next to the word Opacity (the red arrow is pointing to it). I dragged the slider to the left to take the opacity of Layer 1 down, while leaving the opacity of the Background layer at 100%.
This is really where the tutorial ends, and you will just have to keep playing with things until you get the look you want.
Something I learned while texturizing was that the color of the photo you are dragging on top of your original image can directly affect the results. I took this yellow-ish texutre and dragged it on top of my composition.
And it gave me a much more "antique" look.
I then decided to get all crazy and test out this texture I collected at the Coliseum in Rome.
Not something you could use every day, but it might turn out really cool if you "created" a graffiti texture that included a heart, your wedding date, and other significant text and symbols and used it for a Save The Date.
Here are a few Before & After shots of photos I texturized and used for our Postcard Guestbook.

I never had the chance to use this photo anywhere, but it is definitely one of my favorite photos from our trip to Poland!


6 comments:
Oh man, these look awesome! I've got to try this! I must get Mr RS to put photoshop on my computer so I can play around with it. Truth be told, I'm a bit (ok, very) afraid of it! It looks so complex! But if I start out by following your tutorial, I can't go too far wrong...
Oh and I love crisp vibrant photos AND textures (if they haven't gone overboard), so lucky me :-)
Ooh I never would have thought to try using textures as an under layer. What a cool idea. I may have to try that with some of our more halloweeny images.
Thanks so much Jenna.
That is so neat, I'll have to remember this :) Great pictures by the way!
These look awesome!
Okay I loved this so much, I did some of my own at my blog.
Thanks so much.
eeek! this is just what I need for my website design class. thanks jenna!
Post a Comment